Setting up CI/CD with Github Actions
Hopefully you’ve taken a break since finishing the frontend setup. We’ve successfully setup a static website in Azure, configured a CDN, and enabled HTTPS with our resume in HTML. That in itself is a huge achievement! I felt out of my element for most of it, but I really enjoyed getting my hands dirty navigating Azure.
But there’s more to the challenge – we still need to setup a backend. This part of the challenge will use an API to interact with a CosmosDB and display a visitor counter on the site. I used Visual Studio Code for this part of the challenge since it has a variety of extensions that work well with Azure. One of them is GitHub Actions which can be setup to automatically update our storage container each time we push changes to our repo. This is a much better method than manually uploading files to Azure, since GitHub has version control and integrates into Visual Studio Code.
GitHub account and Visual Studio Code
Getting all of this setup is pretty straightforward if you follow Microsoft’s Documentation, but I did run into an issue with authentication which I’ll go into in detail below. First thing to do is sign up for an account at GitHub:

You’ll also need to create a new repo within GitHub. This is where our files will be stored, where we’ll push updates to, and where we can include documentation.
Once you’ve got your GitHub account, GitHub repo, and Visual Studio code setup install the following VS Code extensions:
- Azure
- Azure Tools
- GitHub Actions
- Azure Resources
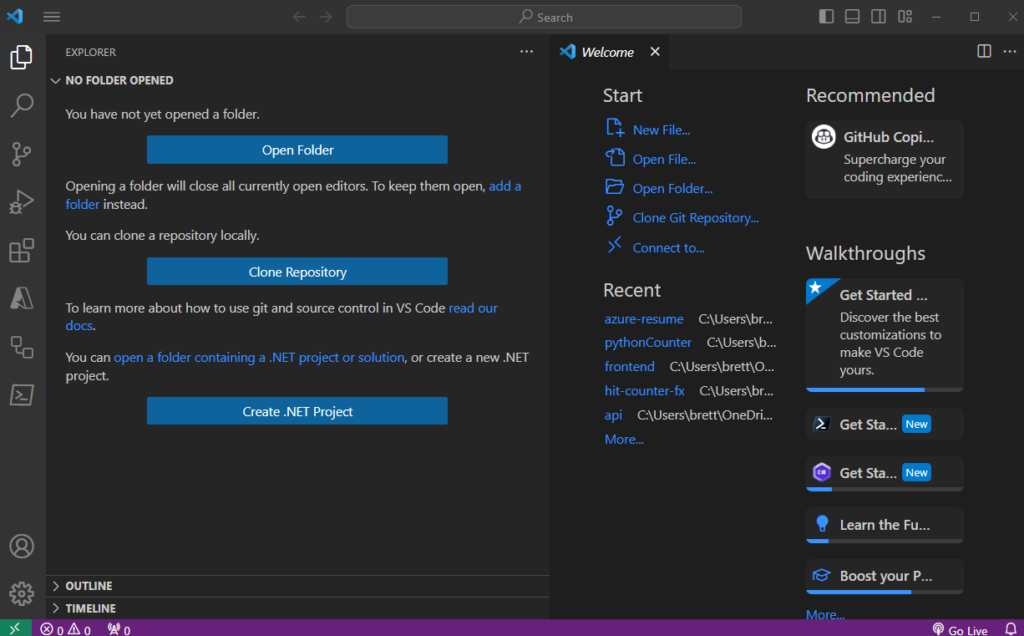
Sign into your Azure and GitHub account within VS Code. The first thing you’ll want to do is clone your GitHub repo (even tho it’s empty) to a folder on your local machine. To do this, create a new folder (I created “azure-resume” in my Documents folder” and then open a new project in VS Code explorer:

Click Clone Repository – Clone from GitHub – select your profile and repo (techbrett/azure-resume) and then select the folder you’d like to clone to. You can also do this by opening a terminal in VS Code, navigating to the local folder you want to clone to, and running:
git clone [YOUR REPO URL] Your VS Code should now look like this, with a blank README.md file:

Create Azure Service Principal
Great! We’re ready to begin. Click the navigation button in the top left – Terminal – New Terminal. Run the az command in the terminal to verify you’re connect to your Azure account:

For the next command we will need the subscription-id, so run the following command: az account list and locate the subscription you've been working with for this project:
Then enter the following command to create a service principal:
az ad sp create-for-rbac --name "myML" --role contributor --scopes /subscriptions/<subscription-id>/resourceGroups/<group-name>Where –name can be GitHub or however you’d like to name the app, <subscription-id> will be from the command we ran previously, and <group-name> can either be the existing group you used for the static website resources, or you can create a new one prior to running this command. The command should complete without any errors:

You will need this output in the next step, so copy and paste the entire thing in between the brackets. From there just follow the Microsoft documentation.
Configure GitHub Secrets
We need to securely store our Azure credentials within GitHub, so that when the workflow runs it can automatically make changes to our Azure storage account.
Access your GitHub profile and repo, click Settings and then Security – Secrets and Variables – Actions.

Click New repository secret. Now, copy and paste the entire JSON output from the command (az account list) we ran earlier and paste it in the empty field.

Save the secret as AZURE_CREDENTIALS. Click Add secret.
Create Workflow
Now comes the actual meat and potatoes of this part of the project. Following Microsoft’s documentation I expected this to be straightforward – and it mostly was. I ran into an issue with authentication though.
Go to Actions within your GitHub repository.

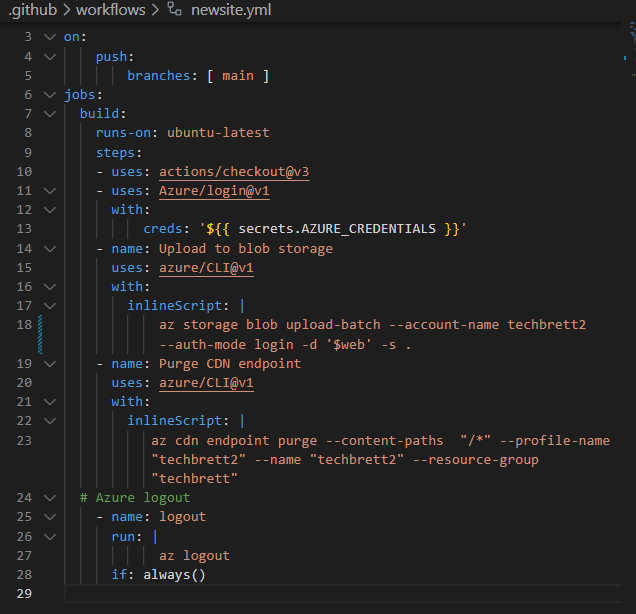
Select New workflow and then Set up your workflow yourself. Stick to the Microsoft documentation, but mine did not work with –auth-mode key Instead I had to use –auth-mode login and it worked! Here’s how my code looked:

And here’s the code written out, obviously replace –account-name, –profile-name, –name, –resource-group, with the storage account name, CDN profile name, CDN endpoint name, and resource group that you’d like to update.
name: update site

on:
    push:
        branches: [ main ]
jobs:
  build:
    runs-on: ubuntu-latest
    steps:
    - uses: actions/checkout@v3
    - uses: Azure/login@v1
      with:
          creds: '${{ secrets.AZURE_CREDENTIALS }}'
    - name: Upload to blob storage
      uses: azure/CLI@v1
      with:
        inlineScript: |
            az storage blob upload-batch --account-name techbrett2 --auth-mode login -d '$web' -s .
    - name: Purge CDN endpoint
      uses: azure/CLI@v1
      with:
        inlineScript: |
           az cdn endpoint purge --content-paths  "/*" --profile-name "techbrett2" --name "techbrett2" --resource-group "techbrett"
  # Azure logout
    - name: logout
      run: |
            az logout
      if: always()
This workflow logs into the Azure account using the AZURE_CREDENTIALS secret we saved earlier. Then it uploads all changes to our local repo to the Azure storage account specified. Finally, it purges the CDN so that when a user views the page they’re viewing the latest changes. Finally, it logs out.
If the workflow completes without any errors, that means it was successful. It will look like this:

So going forward, any local changes made to the repo will automatically update the Azure Storage account when running the following commands within a terminal window in VS Code:
git add .
git commit -m "Enter commit message"
git push
Sometimes there will be an incosistency with the files and you’ll need to run:
git pull
git push
And that wraps up the CI/CD portion of the Azure Resume Challenge!

Leave a Reply