Setup a CDN Endpoint for HTTPS
So far, so good! We’ve got a storage account setup with our files uploaded, and we can access our site using our custom domain name with http and the www subdomain. But part of the Cloud Resume Challenge is configuring a CDN within Azure and enabling HTTPS. This is where I ran into a lot of trouble, because my understanding of DNS records, subdomains, and root domains was fairly weak. If you’re unsure of yourself like I was, I recommend watching a Youtube video that explains the different parts of a domain’s DNS records, like this one here: https://www.youtube.com/watch?v=HnUDtycXSNE
Keep in mind that you don’t need to use the registrar you purchased the domain from as your DNS records host. You can just point the nameservers to another service (like Azure DNS or Cloudflare) and edit DNS records there and take advantage of the extra features. This will come into play later when I get into getting the root domain to work. But for now, let’s get the CDN configured.

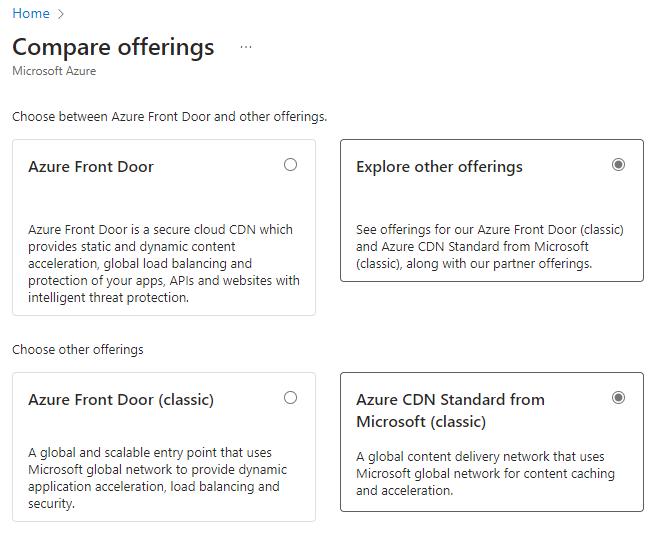
First thing is to navigate to Front Door and CDN profiles. Looking at other tutorials, it looks like Microsoft combined these into a single service. Click Create and select Explore other offerings and click Azure CDN Standard from Microsoft (classic). You can do a Front Door if you want more granular control over the routing, but it is more expensive – $35/month plus data fees. I’ll go into this later, but a CDN is much cheaper and with the correct configuration it will perform just the same.

Select the subscription you’d like to use, and either create a new resource group or use the one you’ve been using for this project. Keep in mind that the CDN profile and CDN Endpoint are two different things, but I gave them both the same name. Select Microsoft CDN (classic) for the pricing tier, and check Create a new CDN endpoint. Give the endpoint a name, and be sure to select Storage static website for the Origin type, and select your static website endpoint for Origin hostname (the one that ends with web.core.windows.net). You can select Ignore query strings for query string caching behavior. Click Review + create, then click Create.
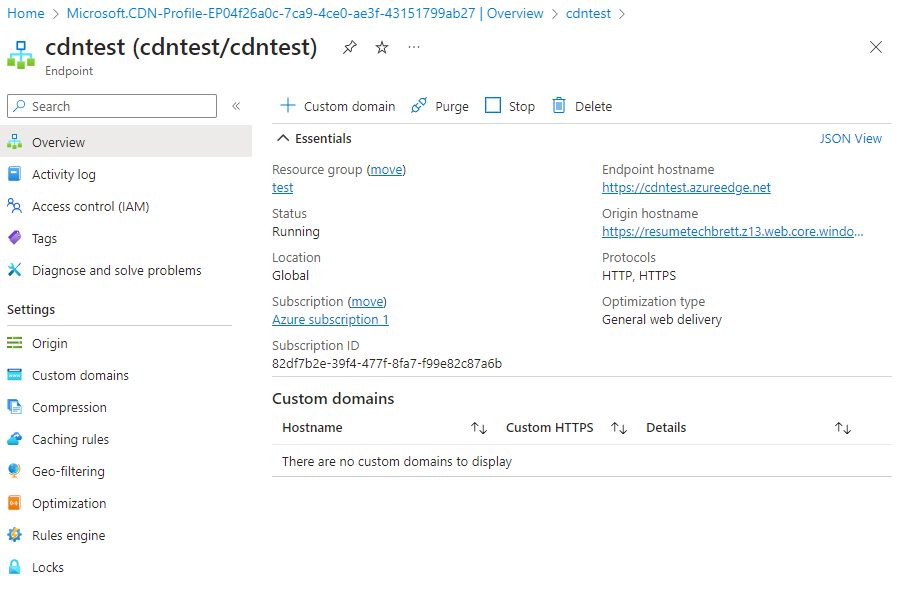
Open the resource once it’s created, and then click on the newly created endpoint (ends with azureedge.net). You’ll see info about this endpoint, and you should be able to access the contents of the $web container (your html resume) by clicking on the HTTPS Endpoint hostname in the top right. Pretty neat!

But we’re not done yet! We want a nice custom domain to point our potential future employers and colleagues to, so click on + Custom domain at the top. Now, this is where things got a little tricky for me. I learned the hard way how www is a subdomain and how www.mydomain.com is different than just using mydomain.com. Microsoft recommends adding cdnverify to your CNAME records to minimize downtime. Open up the DNS records for your domain and add 4 new CNAME records like this:

Host: cdnverify
TTL: 3600
Record type: CNAME
Value: cdnverify.cdnendpointname.azureedge.net
Host: cdnverify.www
TTL: 3600
Record type: CNAME
Value: cdnverify.cdnendpointname.azureedge.net
Host: www
TTL: 3600
Record type: CNAME
Value: cdnendpointname.azureedge.net
Host: @
TTL: 3600
Record type: CNAME
Value: cdnendpointname.azureedge.net
Give this some time and then go back to the custom domain panel of your CDN Endpoint. Input each custom domain and add then to your endpoint. You’ll see them show up with HTTPS as disabled. If you are okay with your website being accessed by typing in https://www. before the domain, then you can enable HTTPS and select Azure Managed CDN on the next screen. But I really wanted my root domain techbrett.net to just work when typed in, without using a simple redirect (which I couldn’t even get working). Keep reading if you’d like to see how I pulled that off.

Leave a Reply