Enabling HTTPS on your Azure CDN
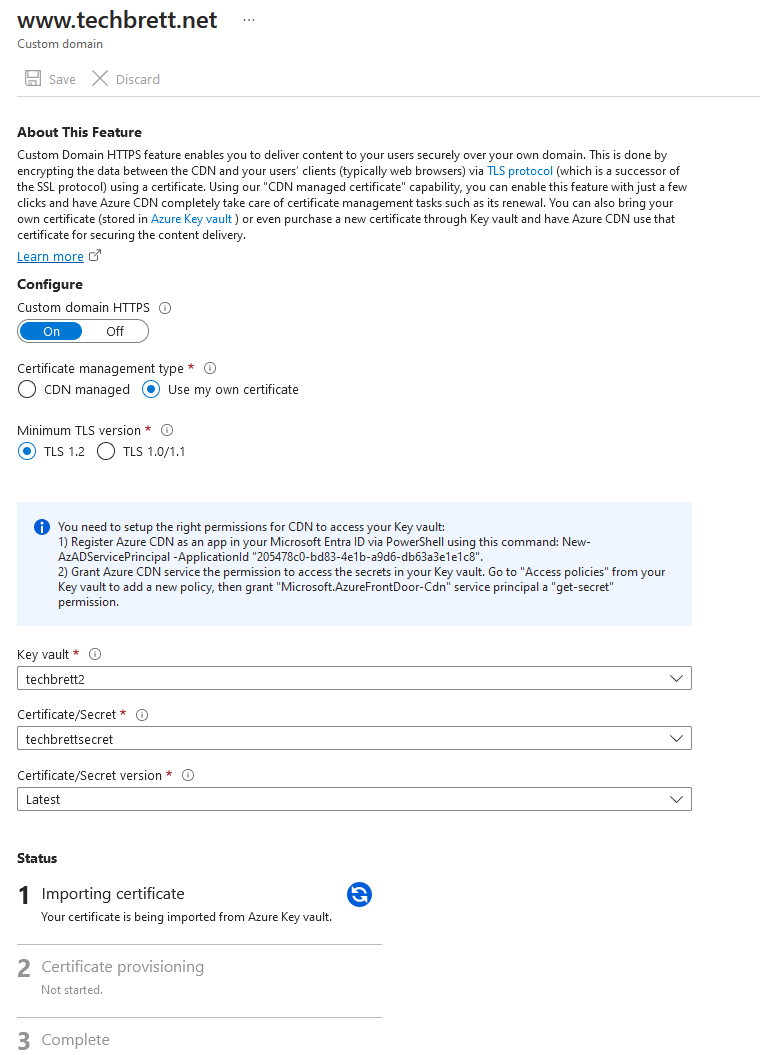
Alright, we’re on the home stretch! Now that we’ve purchased an SSL cert for $11 on Namecheap, and added it to our Azure Key Vault, we can use that certificate to validate our domain and deliver the site using HTTPS. Open up the Front Door and CDN profiles within Azure, click the endpoint we created, and click on one of the custom domains we’ve add. As long as your PositiveSSL cert included both the root and the subdomain www, and if you’ve set everything up correctly, you should be able to use that imported certificate in the Key Vault. Click On for Custom domain HTTPS and select Use my own certificate. Go through the settings to select your Key Vault, Certificate/Secret, and then Latest for the last field. It’ll pretty much look like this:

This will not go through until the steps listed in the blue info box and to setup the correct permissions. Follow those 2 steps exactly. I’ll list the steps out here as well:
Open a PowerShell prompt and run the following:
This will install the Azure AD CLI (Command Line Interface) for PowerShell, which is needed for the next two commands:
Install-Module AzureADAuthenticate with Azure:
Connect-AzAccountGive the Azure CDN service account an AD Principal in your default Azure AD instance: Note: The GUID in this command is the same for everyone — no need to change it.
New-AzADServicePrincipal -ApplicationId "205478c0-bd83-4e1b-a9d6-db63a3e1e1c8" -VerboseNow, back in the Azure portal, in the Key Vault, select the “Access Policy” pane and click “+ Add Access Policy”. Keep in mind you may need to disable RBAC and enable Vault Access Policy in order to grant the newly created service principal the correct permissions.
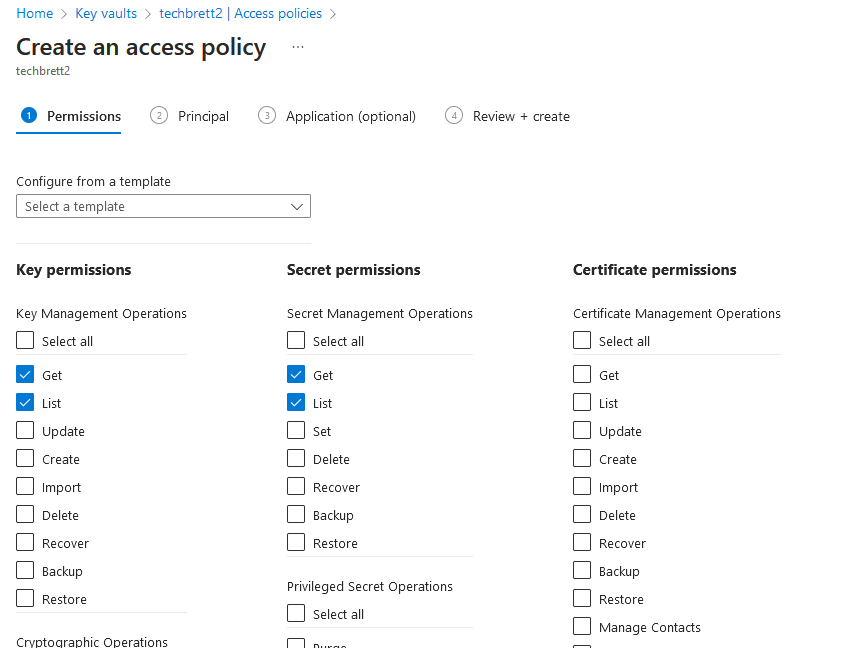
Click Create, and select Get and List for both Secret Permissions and Certificate Permissions, like so:

Also note that the service principal is now named Microsoft.AzureFrontDoor-Cdn – Microsoft always changing things on us!

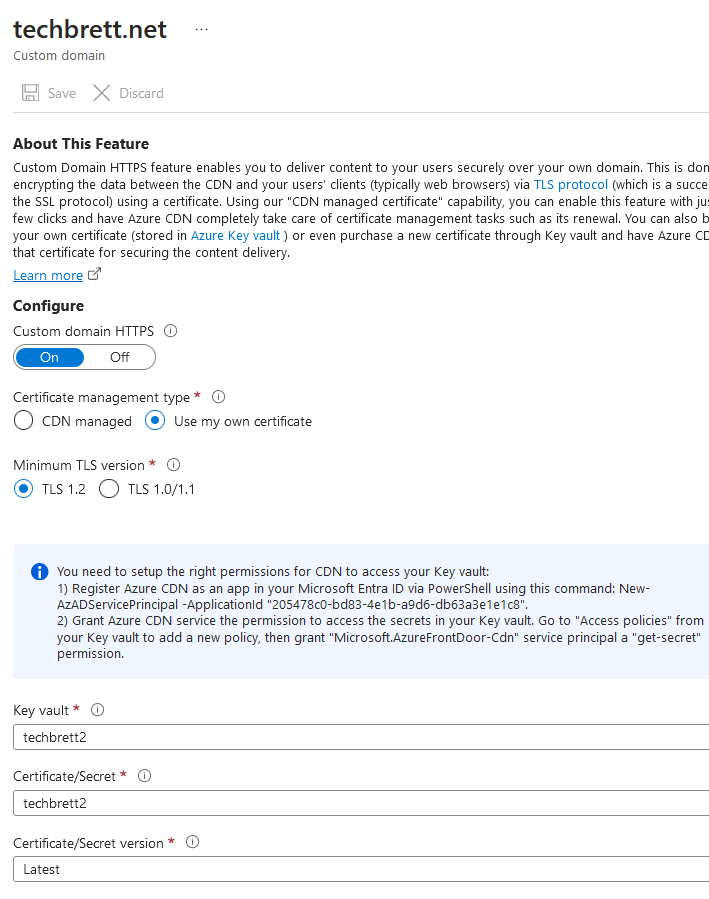
Nowwww you should be able to go back in and complete the HTTPS enabling process with your own cert. Here’s a screenshot of my root domain after it was added to the CDN endpoint:

It may take a few hours, but eventually you’ll get 3 green checkmarks at the bottom:

Give DNS some time to propagate, and you should be able to access your domain by using the root only!

I can’t figure out how to make the gif larger, so just right click and open the image in a new tab – using the root domain techbrett.net is now working with the help of our own SSL cert, Azure Key Vault, and CNAME flattening via Cloudflare!

Leave a Reply