Import SSL cert into Azure Key Vault
I’ll admit I struggled with this part of the challenge. Originally I tried using email to verify the SSL cert (since the CNAME was taking so long to verify), but I quickly learned that you need to verify it within Azure for it to work properly. And to do that Azure requires a .pfx file which was not included in the email with my SSL cert. So I had to dive into how to create a .pfx file from a .crt, .ca-bundle and private .key file.
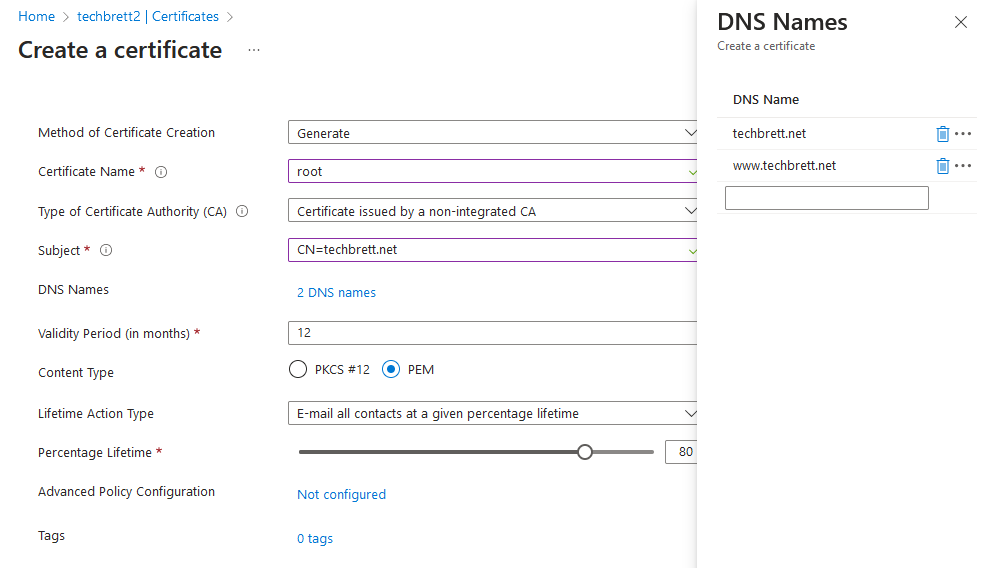
From the Once you’ve purchased the cert, it’ll say “In Progress” within your Namecheap account. We’ll verify it through Azure Key Vault. Create a new Key Vault and click Certificates. Click Generate/Import. Give it a name, select Certificate issued by a non-integrated CA, enter CN=mydomain.com and click DNS Names and enter in your domains. The PositiveSSL cert I purchased included the www subdomain so I added that in as well. Select PEM as the content type and click Create.

The cert will be created but disabled. On the next screen click Certificate Operation and then Download CSR.

Open the downloaded .csr file in a program like Notepad or Notepad++. It should look like this:

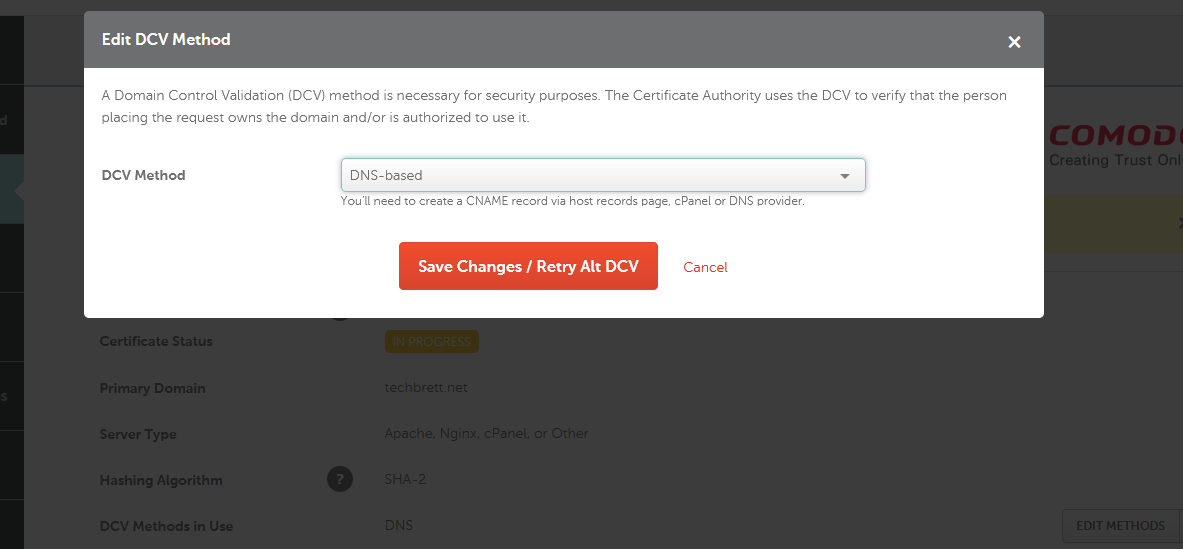
You’ll need to copy and paste that entire thing into Namecheap to verify the SSL cert. Namecheap will provide you a CNAME record to add to DNS to verify your domain and activate SSL. After adding the CNAME, go back into Namecheap and find the button Edit Methods – click the little error and click Get Record. Click Save Changes / Retry Alt DCV. This should verify your SSL Cert for your domain.

You’ll get an email afterwards with a zip file containing a .crt and a .ca-bundle file. For whatever reason, my cert didn’t include a .pem or .pfx file that included the private key. There’s probably an easier way to do this, but I just went back into the Certificate in the Key Vault, click Merge Signed Request under Certificate Operation. Congrats! Your cert has been added. You can try going onto the next step to enable HTTPS and pointing it to the cert in your key vault. Mine gave me all kinds of problems where Azure couldn’t parse my certificate, then it needed a .pfx file. So if you’re running into issues like that, read on.
Acquiring Cert Private Key
Once the certificate has been added in Azure and is enabled, click on it, click on the current version, and click Download in PFX/PEM format. Open that .pem file in Notepad, and copy and paste the everything from —–BEGIN PRIVATE KEY—– to —–END PRIVATE KEY—– and save it to the same folder as the .crt file you downloaded from the SSL email earlier as private.key. Now we need to create a .pfx file. This requires OpenSSL, but that can only be run on Ubuntu. If that’s the OS you’re running – great. If not, read on.
Creating .pfx file via openssl and Chocolatey
You will need Chocolatey installed on Windows in order to run this command. You can find the documentation here: https://chocolatey.org/install . This requires an administrative shell (like powershell). I’ll just copy and paste the instructions here.
With PowerShell, you must ensure Get-ExecutionPolicy is not Restricted. We suggest using Bypass to bypass the policy to get things installed or AllSigned for quite a bit more security.
Run Get-ExecutionPolicy. If it returns Restricted, then run Set-ExecutionPolicy AllSigned or Set-ExecutionPolicy Bypass -Scope Process.
Now run the following command:
Set-ExecutionPolicy Bypass -Scope Process -Force; [System.Net.ServicePointManager]::SecurityProtocol = [System.Net.ServicePointManager]::SecurityProtocol -bor 3072; iex ((New-Object System.Net.WebClient).DownloadString('https://community.chocolatey.org/install.ps1'))Paste the copied text into your shell and press Enter.
Wait a few seconds for the command to complete.
If you don’t see any errors, you are ready to use Chocolatey! Type choco or choco -? now, or see Getting Started for usage instructions.
Next we need to install OpenSSL with Choco, so run this command:
choco install openssl If you run into errors about dependencies you can run the following command to just force it along:
choco install openssl --ignore-dependenciesIt’ll be easiest if the .crt file, .ca-bundle file and the private.key file we created are in the same folder. Navigate to the folder containing both files and run the following command:
openssl pkcs12 -export -out server.pfx -inkey private.key -in your_certificate.crt -certfile ca-bundle.crtDO NOT give the .pfx file a password – Azure won’t like that. This will output a file named server.pfx which is exactly what we need!
Import .pfx file as certificate in Key Vault
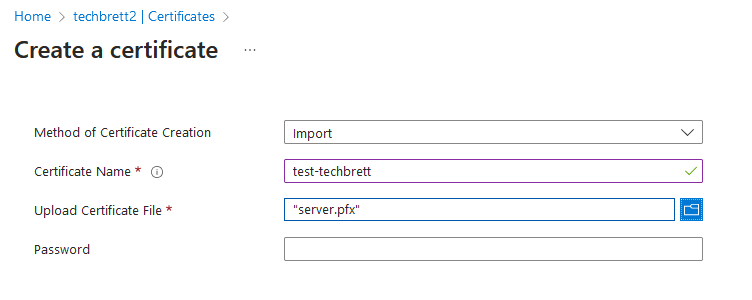
Go back into the Azure Key Vault, click Certificates, click Generate/Import, only this time select Import and point it to the sever.pfx file we created.

This should automatically import and enable the certificate within your Key Vault. Remember the name of the cert and the key vault as we’ll need this in the next step.

Leave a Reply